A holistic approach to health, joy, and good food.

Wednesday, December 12, 2012

Rustic Chipotle Cilantro Burgers

These are delicious, but not very sexy.....not flamboyant in any way, not pompous, just simple, delicious and nutritious.  They're kind of unassuming and shy, actually...but they hit the spot.  They can be eaten as is, out the door in a napkin, or between some home made bread, avocado, and lots of delicious sweet onion. 

If you like veggie burgers but you don't like the price, these are great for that reason also.  Filled with heart-healthy fiber, and packed with a kick, they are a snap to make...and to boot, they freeze well (which is why they are on my regular rotation).  

I regularly use my pressure cooker (1) because it's fun, (2) I feel like I'm using heavy machinery, (3) it's a gadget, and I love gadgets, and (4) it's so super cheap to make beans! And they always come out perfect.  Just make sure you soak your beans overnight and cook them with kombu in the pressure cooker, based on the manufacturer's instructions.  Otherwise, you can use canned beans (but please buy BPA free like Eden brand, and give them a good rinse).  

1 zucchini, shredded
1 onion, chopped fine
1 teaspoon coconut oil
1 teaspoon chipotle powder
3.5 cups cooked chickpeas
1 cup rolled oats
1/2 bunch of cilantro, chopped
salt and pepper, to taste


First, saute the zucchini and onion in the coconut oil until they start to sweat, about 5 minutes.  Place these in the food processor with the chickpeas, chipotle, & oats. Add the cilantro, and blend (not too much - you should still be able to see some of the cilantro vs. creating a green batter). 

By 1/3 cup full, create patties and place them on a cookie sheet lined with parchment paper.  These will be pretty sticky and will not want to leave your hands, but just pass them between your hands until they resemble a semi-flat shape (about 3/4 inch thick).  If this is too sticky for you, let the batter sit for 10 minutes and the oats will draw in some of the moisture and solidify the batter a bit more.  

Bake at 350 for 30 minutes.  Enjoy!

I like to salt/pepper these right out of the oven.  The reason being that I want the salt taste to hit my tongue, rather than it being dispersed in the whole batter.  I end up using less salt that way. But you can salt as you'd like. 

Tangerine Cacao Chia Pudding

One of my favorite recent splurges was a tangerine essential oil from Young Living.  Worth every penny (and it cost a pretty penny!) At the beginning, I cherished it and dabbed a drop on the inside of my wrist and breathed in the amazing vapors.  More recently, I've adventure to include it in foods and let me tell you, it's out of this world.

Everyone has a good recipe for chia pudding, but this one, if I may say so myself, is out of this world. There's something about the combo of orange/tangerine and cacao.  Not sure what it is.  Perhaps I grew up with it in Romania, but I can't remember....for some reason, it hits a deep spot in me from my childhood.  I still have yet to place it but whenever I taste it, I love revisiting.  (Upon writing this story, I asked my husband if he could place it and he said..."I know what it is...Milano Cookies".  I can't believe he beat me to it! Hence the name...Thank you, Nate...)

Chia balances blood sugar, fills you up with fiber, anti-inflammatory omega 3's, and it's so fun to eat! Kind of crunchy, keeps you hydrated (since it absorbs at least 10 times its weight in liquids), and keeps you satisfied for a long time.  I love it - it's in my essential pantry items list (although I keep it in the fridge). 

This chia pudding pretty much makes itself.  The work is super minimal, but I highly recommend giving it a good stir so the seeds don't all get lazy on the bottom of the jar.


4 cups almond milk
3 heaping tablespoons cacao
4 heaping tablespoons chia seeds
2 tablespoons maple syrup
5 drops Young Living tangerine oil (link HERE)

Easy version (but might be more clumpy):  Mix all the ingredients in a mason jar and give it a good shake.  Please make sure you do this next step - once you've given it a good shake, stir it up a bit with a long spoon just to dislodge any chia that may have stuck to the bottom.  Keep it in the fridge for at least 4 hours, and give it a good shake (or stir) every so often. Some people weep when they eat this.  It's that good. 

Harder version, but worth it:  In a strong blender, combine the milk, cacao, syrup and tangerine oil until smooth.  Pour this out into a bowl and whisk to make sure it's all combined well (and just to look at it - it's so pretty :) 


 Add in the chia....

And mix well for about 5 minutes (yes, I said 5 minutes).  Then refrigerate from 4 hours to overnight and enjoy.  Mix well again before serving. 


Tuesday, December 4, 2012

Maple Amaranth Porridge

I love oatmeal as much as the next guy, but sometimes I like to mix up my grains a bit and get a little crazy.  Like this Maple amaranth porridge.  I was transfixed by how crazy little this grain is, and how packed with nutrition it is. I would highly recommend you try different grains, and start with this one for complete beginners.  Amaranth cooks down into this gelatinous beautiful goop. 

A native of Peru, Amaranth is packed with calcium and protein and it also contains "lysine", an amino acid which is not as common in other grains. It's known to lower cholesterol, is good for the heart, and it's gluten free.  It's an all-around winner, I say.


1 cup amaranth
3 cups water

Cook the amaranth in the water until most of the water is absorbed.  Cover and let cool.  You can make a big batch of this (as I do) and scoop out a portion to make for your porridge.

3/4 cups almond milk
maple syrup
cinnamon

Scoop out 1/2 cup amaranth into a pot and add about 3/4 cups almond milk, preferably home-made.  Let it simmer and thicken, just a few minutes.  You may use a whisk to break down the lumps of amaranth.  Pour out into a bowl, season with a little sea salt, maple syrup and cinnamon and enjoy.  

Monday, November 12, 2012

Easy Corn Cilantro Burritos on the Cheap

My son loves burritos, but I don't like the price of them, especially how quickly he goes through them.  They're a perfect after-school snack, but easily 3 or 4 in one week for almost $3 a pop is quite a hefty price for burritos.  For months now, I've been making these spiffy little guys and I feel much better about the fact that they're from scratch, no oil added, loaded with veggies and as fresh and wholesome as can be.  I hope you enjoy them as much as my son does!

He loves both cilantro and corn, so enter the perfect marriage of two wonderful flavors! These are a snap to make and you'll be set for about 2-3 weeks with enough burritos to feed a small army.  Or a growing son. 


You can adjust pretty much everything in this recipe, from the veggies you add,  the seasonings, to even doubling it and being set for weeks at a time.  I also use sprouted wheat tortillas with whole grains and loads of fiber, so there's added nutrition and digestibility there.  

I make my beans from scratch, but you can definitely use a can if you need to.  Just make sure it's EDEN, as they are BPA free, and remember to rinse them really well to freshen them up.

What's great is that I reuse pretty much everything - as soon as we unwrap a burrito, we save the parchment paper we wrap them in and put them back in the freezer bag.  When they're all gone, we reuse the bag and the parchment and start all over again.  Super cheap, super easy.  That's how we roll. 


Veggie mixture:
1 teaspoon coconut oil, optional
1 vidalia onion, chopped
1 red pepper, chopped
1 teaspoon cumin
3 large stalks kale, de-stemmed and chopped

Bean mixture:
3 cups black beans
1 scant teaspoon sea salt

Add ins:
1/2 cup organic salsa
1 heaping cup loosely packed cilantro, chopped
1/2 cup defrosted or fresh corn
1 seeded jalapeno, optional (adjust to your own heat preference)

Combine the veggie mixture (without kale) in a saute pan and either use the coconut oil if desired, or a little broth to get everything going, until soft. Add in the kale and just give it a quick stir for a minute until it wilts down.  Let cool. Process lightly in a food processor. Set aside.

In a food processor, process black beans and salt until it becomes a smooth paste.  Set aside.


In a large bowl, combine the beans, veggie mixture until well incorporated.  Add in the "add ins" and mix well.  


Set aside your tortillas.  Add in about 1/3 to 1/2 cup of the mixture in the middle.  


Flip the bottom side up over the mixture. 


Flip the left and right sides over. 


Flip the whole burrito over, keeping the mixture in as much as possible.  


Wrap in parchment or wax paper and place them all in a freezer bag.  

When ready to use, wrap in aluminum foil or even just leave in the parchment paper (don't use the wax paper for this step) and bake in a convection (or regular oven) at 350 degrees for about 50 minutes.  Enjoy with fresh tomato salsa, avocado, and raw cashew sour cream.  

Sunday, November 11, 2012

Maple Apple Cranberry Chutney


Cranberry Sauce is one of my weaknesses, and until about a few years ago, it did certainly involve shaking out this crazy but fun gelatinous tube of "sauce" out of a can. I thought it was funny that it would remain in that solid blob, but I didn't mind. I'd just take a fork and go to town.  The taste of sweet and tart was undeniably irresistible, and I could eat the whole thing myself, with or without turkey.

After turning plant based, I realized that every department of my culinary life could use an overhaul, or at the very least, a huge improvement. Out went the turkey, but would the can of cranberry "sauce" follow? It was a personal decision for me, but yes, of course, it had to.  I guess formerly I didn't mind that I could save a can or two in my pantry and it would never go bad (insert vision of me eating cranberry sauce in the summer time, spring time, autumn, you name it).  Now that I know better (and have discovered the pop that fresh cranberries make when cooked) I'm hooked to a more mature version of this addictive concoction.  Enter the chutney.  

This maple apple cranberry chutney isn't too sweet, too tart, it just...lingers.  Like a good sunset or a fabulous book.  It takes a little while to taste all the flavors, but it is well worth the wait.  Just use a grown up fork and again, go to town (but in a civilized way, of course).

1 bag fresh cranberries
2 medium sweet apples, such as honeycrisp, diced
Juice from one or two large oranges 
dash cinnamon
dash ground cloves
dash nutmeg
1/3 cup maple syrup, or more or less to taste
sea salt, to taste

Combine all ingredients (except for the maple syrup and salt) and heat over medium until bubbly.  Lower the heat and cook until thickened.  Add the syrup and salt and taste to adjust to your liking.  Eat it hot, warm, or cool, with a big spoon.  

Thursday, October 25, 2012

Curried Peanut Pumpkin Soup

Today marked our first Purple Dragon CSA deliver at our home....we've waiting for this for some time now, ever since we agreed to host a few weeks ago.  This entailed painting our garage, and creating these beautiful barn-like doors (courtesy of my husband's creativity and vision), shopping around for boxes, coordinating contact info and sign ups.  And lo and behold, 5:00 am they arrive in all their glory - fresh fruits and vegetables, organic, mostly local, and absolutely brilliant.  Despite my lack of sleep, I was ecstatic and running with energy. 


I think the trick is to literally be in love with health and good food.  Carrots, apples, pears, cilantro, onions, too many to name...unpacking everything I slowly began to realize what it actually takes to get this food to our table. How many hands has it passed, labor, time, money, distance.  I fell in love with it all over again, the whole process of farming, gardening, growing food, ensuring that it's organic, alive, real. I have a deep respect for food since for me, it really is my medicine.  

So medicinally, this morning I needed soup. And I also had this monstrous chunk of a cheese pumpkin that I had to put into effect pronto, mainly for the reason that my fridge couldn't house it.


This recipe was pretty haphazard...I don't quite exactly remember the quantities, so you might have to make some adjustments for your taste buds.  But it's simple, quick, and utilizes the bounty of today's harvest from Purple Dragon.  

1 tablespoon unrefined virgin coconut oil
1 hefty carrot, chopped
1 onion, chopped
3 stalks of celery, chopped
5 cups peeled, seeded and cubed "cheese pumpkin" meat
3 potatoes (white or sweet potatoes are both great), cubed, with skin
1 medium apple, with skin, chopped
2 heaping tablespoons almond or peanut butter
2 tablespoons curry powder
1 teaspoon cinnamon
1 teaspoon cumin
cilantro and pumpkin seeds to garnish

Saute the carrot, onion, and celery in the coconut oil on medium heat until translucent.  Add in the pumpkin, potatoes, apple and enough water to cover by about 1 inch or so.  If you like your soup thick, add less - if more thin, add more.  


Simmer about 40 minutes until all of the vegetables are soft.   Add in the peanut/almond butter, and spices, and blend with an immersion blender until smooth.  Season with salt per your taste, and decorate with cilantro and pumpkin seeds.  Enjoy!

Here's to more pure food, a connection with where it comes from, and community supported agriculture. To your health!


Monday, September 24, 2012

Chocolate Buddha Bowl

Lots of people ask me what I have for dessert, and truthfully it always changes, but when I find something truly magnificent and easy I tend to stick with it for weeks.  Enter the banana berry chocolate buddha bowl.   It has an unusual mix, a hodge podge of good-for-you ingredients, and you get to drink "chocolate milk" at the end.  It's like those cocoa crispies cereal I used to eat as a kid (I know, right?) but better.

Use whatever is in season (this photo was taken when blueberries hit the stores, July), and work your magic. I also used mulberries from our backyard tree, and that was a completely beautiful experience (I grew up with them and think everyone should have a mulberry tree!) Peaches were good for august.  I'm adding apples in September.  You get the idea. It can morph to fit what nature provides each month.


Cacao paste is this new product I found which is literally divine (albeit expensive) but worth every penny. Plus it lasts you months and you only need a little at a time since it's so concentrated. 

The hemp offers superior protein for that little sugar spike you get from the banana, blueberries are full of superfood antioxidants, nuts give you heart healthy and omega-3 fats, and you're good to go.  I have to admit, I have this for breakfast sometimes.  Very naughty, but not really....

Eat, chew, breathe, and be good to your body. 

1 banana sliced
hand full blueberries or berries of your choice
2 tablespoons hemp seeds
1 tablespoon cacao paste, crumbled
1/4 cup mixed nuts (I used cashews, pecans and walnuts, but your choice)
pinch salt
1/3 cup water (yes, I know, but trust me its so delicious)
small drizzle of local honey

Combine ingredients together and enjoy! 


Sunday, September 23, 2012

Our Watermelon "Egg"

This monster was growing in our garden and we hardly saw it develop...it must have been a matter of days since I saw it first at about 7 inches and then poof...there it went.  Exploded.  Blossomed.  Our little watermelon egg. 


Small brownish indent in the grass below is where the watermelon came from...

These are actually two plants, from two seeds...we harvested this one and soon after that, another watermelon popped up. Pretty good, I say just with two seeds, a little water, and sun.  It was one of the most self-sufficient plants we've ever had.  It just did its own thing, and we sat back, relaxed and marveled at how quickly it grew. 

The flesh inside was a bit on the pink side, I think perhaps since I couldn't wait. It was huge, by the way, so I learned my lesson...apparently, it can get even MORE huge.  When tapped, it sounded hollow, so we went to town, sliced it up, and are now beginning to juice it.  Mild in flavor but sweet and super juicy. Delish. 

I hope this inspires you to grow your own next spring - it is incredibly easy to do and in no time, you can have your very own watermelon....

Saturday, September 22, 2012

House Staple Black Bean Salsa Soup

I'm not really sure why I love black beans so much, since we didn't have them as often as you'd think in my childhood...although my mom made a mean re-fried bean recipe with kidney beans, I didn't see black beans very often. I've grown to love them as an adult since they're smaller and have a different bite to them (not as soft) as kidney beans. Although they give a good punch to stews and soups, I find that they're a bit more mellow and blend better with other veggies than some other beans. This is why this soup has become a staple in my home. 

Prior to this soup, I have to admit, I wasn't much of a "soup maker". In my teens, when I was learning to cook, I always followed the recipe for soups, and never veered, since I was always afraid of the quantities of the ingredients.  I thought more like a baker (how I started out) and didn't realize that soups were really, well, a mish mosh of leftover veggies mixed together with patience, a low flame, and some time.  This soup isn't scary. It's really just born out of a "cleaning the fridge" type of day. I guess that's what I like about it. 

2 cups black beans
1/2 cup celery, diced
1/2 onion, diced
5 florets cauliflower, chopped
5 florets broccoli, chopped
1 carrot, diced
1 tomato, diced
1/3 cup peas
1/2 cup corn
3 or 4 cups water
1/2 bottle of trader joe's salsa (others are fine but TJ's can't be beat)
a handful of chopped kale (added at the end)
....and then I moved to the pantry.... 

I don't bother sauteing anything - everything goes in the pot, no oil, no salt, just pure whole food goodness.  Simmer, covered, for about 20 minutes and you're done (add kale at the end to just wilt it).  

On a cold winter day, you can even add chunks of sweet potatoes, or just make it all onion and bean and salsa to keep it simple. This is extremely filling, and if you can invest in a pressure cooker to cook all of your beans, it's infinitely cheap over time. 

Note: this soup turns everything in it dark, including the white cauliflower. If you're weirded out about that, just leave it out. :)

Chopped Mango Salad

This is one of my top favorite salads, and I tend to make a lot of it so it lasts me throughout the week - in 20 minutes you've basically made your lunch for the next 5 days (if it lasts that long). This is also a great transitional salad towards raw. The only "cooked" item is the beans, and everything else is raw, so you can pat yourself on the back as you realize you've done something amazingly healthy for yourself. 

You can tweak it as you wish, but try to keep to the staples - beans, mango, and veggies. The rest is up to you.  Also, for me the cilantro makes it "pop" but for you, that might mean parsley, or another fun herb like basil.  Also, I realize this list is long and it's not practical for some people.  If you only have green peppers, then just use that. If you don't like onions, omit them, etc.  

You want a good balance of sweet (mango) to spice (jalapeno) and also in terms of texture - soft (beans) to crunchy (veggies).  No matter what, experiment, have fun and enjoy the process.


2.5 or 3 cups black beans (or 2 cans of Eden black beans, drained)
  (you can also mix one black bean with one kidney bean)
1/2 sweet onion, diced
1/2 red pepper, diced
1/2 yellow pepper, diced
1/2 green pepper, diced
1 mango, peeled, and diced
jalapeno, diced, to taste
1 medium tomato (or a handful of cherry tomatoes), diced
2 inches cucumber, diced
one large handful cilantro, minced
drizzle of flax seed oil
about 1/4 cup raw apple cider vinegar (or more, to taste)
1 teaspoon cumin
1 teaspoon chipotle powder
salt and fresh black pepper, to taste

Mix everything together and enjoy with a hearty flax seed cracker or with a sprouted tortilla.  I also like it as is with a side of sliced avocado.


Friday, September 21, 2012

Growing A Mango Tree?

We love experiments, and we love learning in this family.  Apart from watching videos of baby animals (that's more my thing) in our down time (which is seldom), we love starting new fun projects that can be done quickly and inexpensively.  

We found this very intriguing video one day, and so we set to work.  I love home projects like this.  The first of which was rooting a pineapple (more on that later in another post).  And now it's the mango tree. Or bush. Or plant. Or anything that will grow out of it.  We have to be patient....

There is is on the right....cute little thing.  It has an unusual shape, a little damp as it comes out of its shell, and has a pointed end.  

Directions: 

Fill a pot with dirt and leave 1 inch from the top.
Cut up your mango, and scrub the seed well with a hard sponge or even a spoon.  When it's relatively clean, find the little knot on one of its sides.  Close to this knot will be a weak spot where you can insert the tip of a butter knife.  Pry it open, slowly, and crack open its shell.  Inside is the mango seed. 

Lay the seed flat on the dirt, and make sure the pointed end (it might even have a little sprout growing) is in the center of the pot - this will eventually grow the stem, so you want to center it. Cover with about 1 inch of dirt and cover with plastic wrap.  Tie a rubber band around the mouth of the pot to lock down the plastic wrap. Leave it on a sunny windowsill and in a few weeks, it will begin to sprout and grow.  This procedure will produce some condensation which will continue to rain down into the dirt, and the process begins again.  In this way, you can go without watering it for weeks, I'd say.  

Enjoy the video for further instructions.  We'll post the progress.  Our little pet.  Such joy :) 
About a month later...

Tuesday, September 18, 2012

Real Chocolate Ice Cream for Real People

So many people I speak with give me lists of their favorite foods, and ice cream is always one of them.  But I often wonder how many of the ingredients in ice cream are (1) recognizable, (2) healthy, or (3) easy enough to make on your own. Yes, heavy cream, sugar and vanilla are what you'd call "pure ingredients" but the truth is, I want the food I eat to give me energy, not take it away, and I've experienced all too well the "sleepy feelings" I get after eating something so fat and sugar laden. Plus I'm not investing in the cholesterol spike, thank you very much. I want something that tastes good, and that is good for me. 

The other thing is, I'm a sucker for convenience.  Are we not all suckers for convenience? And although many people might scoot out the door to the local food store to grab a pint, I just don't have time or patience for that. When I want chocolate, I want it right then and there, so I need to be well stocked with the right ingredients.  Lucky for me, this ice cream has 3 ingredients in it and I make sure they are always in my house (and so can you). 

Real Ice Cream for Real People means this...you are made of live stuff.  You should eat live stuff.  You are not made of dead stuff, so you shouldn't eat dead stuff.  White sugar is dead stuff. Chemicals weren't even alive to begin with.  And the story goes on and on. You get me? Pretty simple.

The first thing you do is grab a ton of bananas when they go on sale (and please make them organic - non-organic bananas have pesticides on them that ultimately lead to cancer in those who work with them and are responsible for shipping them to us. Plus, they're only another 10 cents per pound, so let's just do the right thing). Take them home, peel them all, slice them up, put them in a Ziploc bag and consider yourself saved from chocolate withdrawal for the next month or so. 

Onward and upward...  

3 tablespoons raw cacao powder
(1 tablespoon maca powder
1 tablespoon vanilla extract
1 teaspoon almond extract
pinch salt)
3-4 frozen bananas, sliced
cacao nibs, to decorate

Really, this recipe is made of cacao, banana and nibs.  The other ingredients in the middle in the parenthesis are just optional, but I love adding them.  If using a high powered blender, blend everything together using the tamper as you go (you need to be pretty firm and insistent with it). Sometimes letting the bananas defrost for 4 minutes helps the process along.  Otherwise, place the ingredients together in a food processor and run it, scraping, run, scrape, run, scrape until it starts to defrost a bit into a soft serve.  Just give it some time and patience and in less than 5 minutes you have the most glorious ice cream that is fit for kings (or I should say, the 2 kings and one queen in my family of 3). 

Pour it out, and sprinkle with the cacao nibs. Also, a little toss of unsweetened coconut didn't hurt anyone. 

Just FYI, the maca makes things a tad gelatinous, so when you're using the blender, be prepared to go for the long haul.  The motor might not enjoy it as much, but persist just until you get the right consistency BUT no longer, and you and your blender will live happily ever after. 


Sunday, September 9, 2012

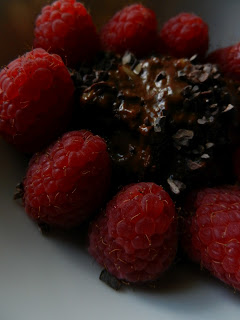
Easiest Hazelnut Chocolate Mousse Ever!

I have to thank my husband for this recipe...he's pretty modest about his culinary talents, but he's amazingly good at what he does.  Actually, he's the type of person that inspires a trainer to work out, or a chef to eat better (meaning me).  And he inspired me with his super quick chocolate gooey mess.  I saw him making this one day when (ironically) I had a chocolate craving the size of Montana, but I was rushing out the door with very little time to make anything.  As I sheepishly eyed his creation, he asked "wanna taste it?".  I devoured half of it...actually 3/4 if I were to be exact. Bliss.  And it hit the spot in the most perfect way.


I bring this to you with a little bit of my spin plunked into it.  I am a hazelnut/nutella hoarder and I had to spike it with some hazelnut extract. Honestly it's the easiest mousse ever, virtually fat free (or extremely low in fat if you have a larger banana), high in magnesium, soluble fiber, taste, and it HITS THE SPOT which is honestly the last thing I need to say about it.  Thank you Nate for this special treat.  A reminder to all of us that simple food is really good food. 

1 banana, about 5-7 inches, peeled and mashed in a bowl
1/4 cup raw cacao powder
1 teaspoon vanilla extract
1-2 teaspoon hazelnut extract
pinch salt
raspberries, to garnish

Mix all the ingredients together and serve with raspberries.  I like mine kind of chunky so I half the banana in a bowl and add the ingredients. By the time everything is mixed, the banana is still a bit chunky. 


Monday, September 3, 2012

Lemony Dill Fennel Salad

For the longest time, I had this love/hate relationship with fennel.  Ok, it was more of a "couldn't be bothered" relationship with fennel. The initial "love" part was that I "wanted to love it" but I didn't, but I felt that it would certainly be something romantic if I did...fennel was one of those vegetables that deserved to be in roman war stories or romance novels or eaten with very small forks by righteous people. But every time I'd taste it, honestly, it just didn't do it for me. It was slightly pompous in its licorice flavor and it needed to be regulated a bit.  That was just my take.  A little tete-a-tete was in order. But now I've changed my tune. Enter one very important ingredient.

Avocado made me fall in love with fennel. They should have been married at some point but it just seems like Italian fennel and California or Mexico avocado would never have met under normal circumstance... Until I furrowed my brow, determined and all, shoved up my sleeves and had them get together in my bowl.  Sprinkled with some dill (where did that one come from) and lemon (I see the Sicilian touch there), what came to be was nothing short of magic.  My new....favorite....salad.  

Here she is, in all her glory.

1 good sized fennel bulb, sliced paper thin
1/2 lemon, juiced (or to taste)
1/2  to 1 full avocado, depending on size, cubed
1 heaping Tablespoon chopped fresh dill
drizzle of flax seed oil
salt, to taste
lots of pepper

Version 1:  The tame way.
Mix everything together gingerly, and enjoy at once. 

Version 2:  The not so tame way.
Massage the fennel between your hands with lemon juice, dill, oil, salt and pepper, and get everything good and cozy.  Let the ingredients meet each other :) Add the avocado, have a little toss, and enjoy this messy beautiful treat. 

Wednesday, August 29, 2012

Herbed Cream Cheese (raw)

Photo by Melissa Skelly Angersbach of Sen Institute
So many people tell me "I'd be vegan if I didn't have to forego cheese".  I understand completely, and at the same time, I feel great hope that in a matter of time they'll change their tune as I did. 

At present, I personally don't miss cheese.  It has something to do with the fact that I haven't had it in so long, and the typical alternatives are gross to me (vegan cheese slices, mostly). In addition, I'm usually not impressed by the ingredients I find in vegan cheese alternatives...they still contain things I can't pronounce and I can't bring myself to call it a "whole food".  But there might be another reason why I really don't miss cheese. 

Flashback about 2 years ago...as a "newbie" vegan, I was having some real trouble letting go of cheese (mostly since we still had it in the house). Although I was only buying about 5 slices to put on our Friday night pizza, I felt myself opening the packet before putting it in the fridge.  It also didn't fare well for the pizza, being that we were left with 3 slices! So I asked my husband for some advice (he's a certified NLP practitioner), since he works with people and addictions and overcoming psychological challenges, and the results were astounding. By way of his NLP exercises, and literally overnight, I found cheese to be absolutely unappealing to me, and I was ecstatic. I was a happy girl, since I wasn't feeling like I was missing that "something" anymore.  I felt happy in my body and happy with the choices I knew were to my benefit, without feeling deprived. More on NLP here, if you're interested (Nate).  

Right now, cheese couldn't be farther from my waking mind. But I know a lot of people still struggle with letting it go, and are unamused by the vegan alternatives found in health food stores.  It just doesn't taste like cheese.  So voila....we created a delicious "cream cheese" equivalent out of raw cashews and probiotics, which not only makes it delicious for your palate, but it's also loaded with good bacteria to keep your digestion happy. 

Indulge.  Go on, it's OK. You'll love it, sans the addiction. 

2 cups cashews, soaked 2-3 hours
1/3 cup hemp seeds
1 tablespoon lemon juice
1 cup warm water combined with 1 heaping teaspoon probiotic powder 
(sold as is, or break open some probiotic capsules and pour out the powder)
1/4 cup chopped chives
1 teaspoon fresh dill
salt, to taste
garnish:  pink peppercorns, tarragon, rosemary, herbes de provence
Flax crackers or veggies to serve

Combine the cashews, hemp, lemon juice, water and probiotics in a blender and blend until smooth.  Pour the mixture into a nut milk bag draped over a small colander to fit, twist the top closed, cover it with a towel, and weigh it down slightly with something light like an empty bowl or small plate.  Leave it to ripen.  Many recipes mention 12 hours, but I like mine a bit more tart and left it 15-24 hours. Just check it and taste it along the way so that it reaches the amount of "ripe" you desire.  Also, make note of the temperature - in high summer heat it will ripen much quicker, in cooler weather slower, so don't be afraid to play around with the recipe.  Make it as ripe as you wish (but know that 24 hours makes it pretty tart). 

When it's time, take the mixture out and scoop it in a bowl.  It might have some air pockets and might seem fluffy (this indicates that the probiotics did their job and is perfectly fine).  Add the dill and chives and season with some salt, to your taste.  


I used two little 4.5 inch removable bottomed molds, but you can use a mini spring form pan, or even just a bowl lined with plastic wrap.  Get creative! Line the mold with wax paper or plastic wrap (I feel like the plastic works better, but some may be opposed). 


Refrigerate overnight until set.  Undo the plastic wrap on the bottom, flip the cheese over on a plate, remove the bottom of the mold, and then remove the plastic wrap. Decorate with crushed pink peppercorns or a mixture of tarragon rosemary and herbes de provence.  Serve with veggies or over flax crackers.  Cheese will continue to ripen a little in the fridge, so it will turn even more tart over time.  Keep refrigerated and enjoy!